
 Home
Home Order Forms
3D Stereo Slide Scanning Service

3D Stereo Slide Resources:
- 3D Stereo Slide Preparation Instructions - How to prepare your slides for scanning
- 3D Stereo Slide Repair Guide - Fix damaged 3D slides before scanning
- View-Master Reel Scanning - We also scan View-Master reels
Professional 3D Stereo Slide Digitizing
We cannot automate the 3D stereo slide scanning process. Each slide requires individual attention, expert color assessment, and professional Photoshop editing. See the order form for our prices.
What's Included at No Extra Charge
- Precision cropping of each image
- Color enhancement for faded slides when possible
- Individual expert review - Each image is viewed and adjusted by a Photoshop expert
- Professional color correction for pleasing, accurate colors
We think our price is fair considering the time involved and especially since we enhance each scanned image at no extra charge.
IMPORTANT POLICY: We will NOT scan both sides of the slide. This is not in our workflow and we cannot change our workflow. Please don't ask. The answer is no. Sorry.
What We Scan
One side of the 3D stereo slide is scanned and digitized. We are mainly interested in the transfer of the slide to digital format. We are NOT converting the stereo slide to digital stereo or to a 3D image—we're creating a high-quality 2D digital image from one side of your 3D slide.
Exceptional Quality: 4,000 PPI Scanning
We scan these slides at 4,000 ppi. You are going to end up with an image that is approximately:
5,256 × 3,544 pixels = 18,627,264 pixels
That's almost 18 megapixel quality!
Your exact image size depends on the area of your specific 3D stereo slide, but you'll always get extremely high resolution suitable for:
- Large format printing
- Viewing on big screen TVs
- Computer monitor display at full quality
- Cropping and editing without quality loss
- Archival preservation
3D Slide Scanning Preparation
In order for us to maintain our low scanning prices, we need you to do some of the prep work for your project. Don't worry—it's not hard! Just follow our simple instructions.
Complete Preparation Guide:
For detailed step-by-step instructions with photos, see our 3D Stereo Slide Preparation Page.
Quick Preparation Overview
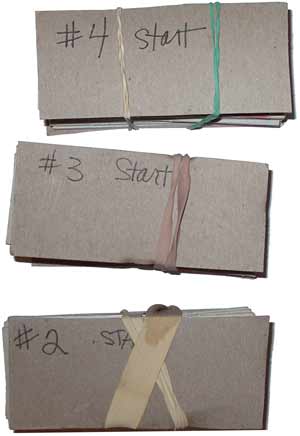
Your slides should be arranged in stacks that will become separate folders on your disk or flash drive.
Critical: Don't Damage Your Slides!
DO NOT put rubber bands tightly around your stacks!
You can easily bend or warp the slides and make them difficult for us to get a good scan. You might want to put the slides in a tightly wrapped envelope rather than use rubber bands. If you do use rubber bands, use a heavy piece of cardboard on both sides of your stack so that the bands do not damage the slides.
Also, do NOT stick anything on the slide that would cause the size to be altered in any way. If you have one side of the slide that is bad, put a piece of masking tape or a Post-It over the bad side, but make sure it only covers the film and doesn't hang over the edges of the slide.
Proper Stacking Orientation
Arrange your slides so that:
- If you put them into a viewer, the side toward you faces DOWN in the stack
- The slides with the company logo should face UP
- The first slide in the stack should be the TOP slide
- Second slide down should be #2, and so on
Number Your Slides (Logo Side Up)
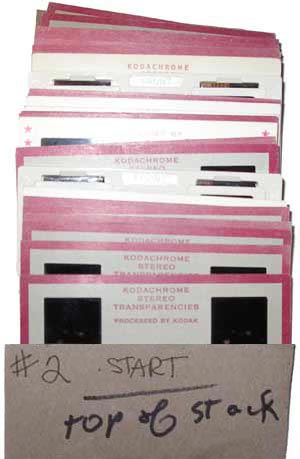
Number your slides clearly on the logo side so we can scan them in the correct order.
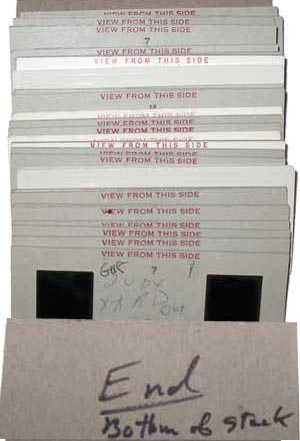
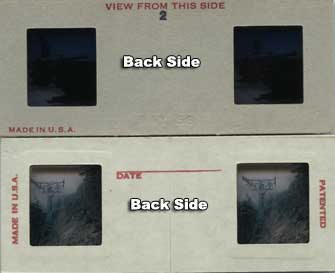
View from Bottom of Stack
The slides below show the stack from the bottom. This is what the back side of your slides should look like when properly stacked.
Marking Which Side to Scan
For whatever reason, you may favor one side of the stereo slide instead of the other. Maybe it's just a better shot and you get more people into it. What we need you to do is use a Post-It to cover the side you do NOT want scanned.
Important: Put the Post-It on the FRONT of the slide, not the back. See examples below.
Front of Slide (Post-It Covering Side NOT to Scan)
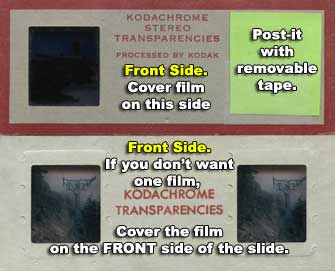
Identifying Front vs. Back: The front of the slide generally has the manufacturer logo or some kind of ID on it. The back side is generally blank compared to the front.
You can also tell if you're looking at the front: If you hold it up to a light and see text, the text should read backwards. Don't worry, this is for scanning purposes only.
Back of Slide
Do-It-Yourself 3D Stereo Slides
Stereo slide aficionados could make their own stereo slides. All they needed was a stereo slide camera. After getting the stereo film processed, they would use these special do-it-yourself stereo slide holders.
How DIY 3D Slides Worked
The films could be slid into the slots—one on the left and one on the right—easily accessible without tearing the holder apart.
Taking Stereo Pictures Without a Stereo Camera
Stereo pictures could also be taken without a stereo camera by:
- Taking one shot
- Holding your position but moving the camera left or right about two inches
- Taking another shot
This simulated what would be seen out of the right and left eyes. Our eyes see in "stereo"—the pictures are taken from different perspectives. Put the processed films into these special holders with open slots, then put the 3D slide holder into a viewer, and you have a 3D stereo view that has depth.
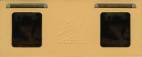
Example of do-it-yourself 3D stereo slide holders with open slots for easy film insertion.
Related 3D Scanning Services
We specialize in all types of 3D and stereo media:
View-Master Reel Scanning
Lots of people had their wedding pictures in 3D on View-Master reels. We can digitize those too! Each reel typically has 7 stereo pairs (14 images total). We scan one side of each pair.
Other Slide Formats We Scan
- 35mm Slide Scanning - Our most popular service
- 110 Slide Scanning
- 120 Slide Scanning
- 126 Slide Scanning
- 127 Slide Scanning
- Magic Lantern Glass Slides
Have Damaged 3D Stereo Slides?
If your 3D slides are damaged, broken, or have separated glass:
Visit our 3D Stereo Slide Repair Guide BEFORE sending your slides. We have detailed instructions on how to repair common damage so your slides can be safely scanned.
Why Choose Our 3D Stereo Slide Scanning Service?
- Expert since 2002 - Over 20 years of professional scanning experience
- Professional Photoshop editing on every scan - No automation, every image gets personal attention
- 4,000 ppi high resolution - Almost 18 megapixel quality
- Color correction included - We enhance faded slides at no extra charge
- Precision cropping - Every image professionally framed
- Personal service in Wisconsin - Your slides never leave the USA
- Free consultation - Questions? We're here to help
Ready to Digitize Your 3D Stereo Slides?
Get started today and preserve your precious 3D memories in high-quality digital format!
Have Questions?
Not sure about preparation or have specific concerns about your 3D stereo slides? Contact us - we're happy to help ensure your project goes smoothly!