
 Home
Home Order Forms
How to Prepare Your 3D Stereo Slides for Scanning
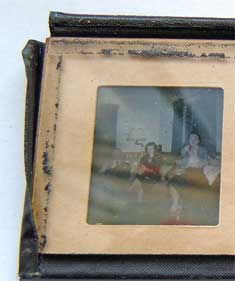
IMPORTANT: If your 3D slides or glass 3D slides are even slightly damaged, click here first for repair instructions.
Why Proper Preparation Matters
In order for us to maintain our low scanning prices, we need you to do some of the prep work for your project. The good news? It's not hard at all. Just follow these simple steps and your 3D stereo slides will be scanned perfectly.
CRITICAL POLICY: We will NOT scan both sides of the slide. This is not in our workflow and we cannot change our workflow. Please don't ask. The answer is no. Sorry.
Step 1: Clean Your 3D Stereo Slides
We cannot stress this enough: You should carefully go over each of your films with a very soft cloth before you send the slides to us.
There is an almost greasy film of dust that gets on old slides. This does not blow off. It stays on until it is wiped off, and we do NOT clean the slides for you. We scan what you send us.
The Sticky Dust Problem
See this example below of the dust that is stuck to this stereo slide. You can see in the dark area where it has been smudged. The light area is the sticky dust.
Before Cleaning: Greasy Dust Film
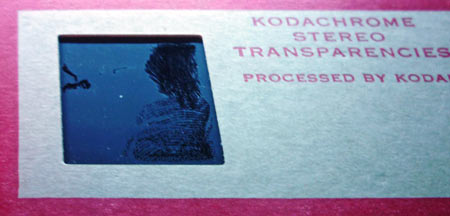
After Cleaning: Just a Few Seconds Makes a Huge Difference!
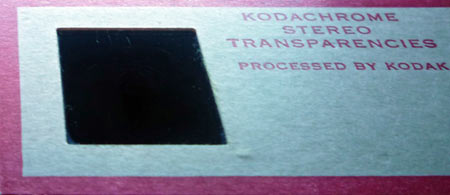
How to Clean: Use a Very Soft Cloth
It will only take you a couple of seconds to clean each slide with a very soft cloth. The difference in scan quality is dramatic.

Step 2: Block Out the Side You DON'T Want Scanned
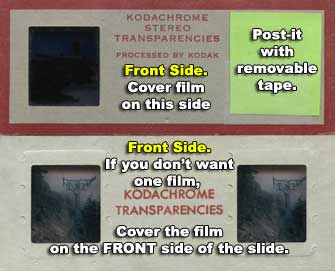
Very Important: We only scan ONE side of each 3D stereo slide. You need to tell us which side to scan by covering the side you DON'T want.
How to Mark the Side NOT to Scan
- Use a Post-It note to cover the bad side (or the side you don't want scanned)
- Place the Post-It on the FRONT of the slide (the side with the manufacturer logo)
- Make sure the Post-It only covers the film and doesn't hang over the edges
- You may want to use removable tape to hold down the non-sticky edge of the Post-It so it doesn't come off
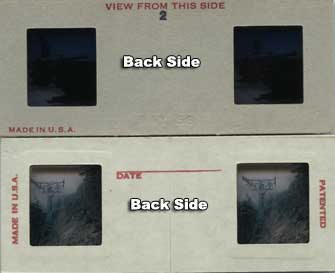
Front vs. Back of Slide: The front of the slide generally has the manufacturer logo or some kind of ID on it. The back side is generally blank. When you hold the slide up to a light and can read text, it should read backwards—that means you're looking at the front.
Example: Using Post-Its to Mark Slides
Front of Slide (Post-It on bad side)
Back of Slide
Stack of Slides with Post-Its
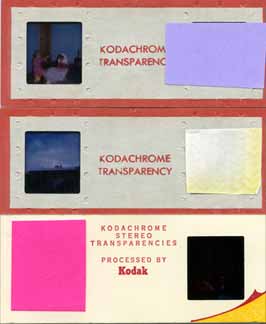
Remember: Do NOT stick anything on the slide that would cause it to have the size altered in any way. The Post-It should only cover the film, not hang over the edges.
Step 3: Stack Your 3D Stereo Slides in Order
Your slides should be arranged in stacks that will become folders of images on your disk or flash drive.
Critical Stacking Rules
DO NOT put rubber bands tightly around your stacks!
You can easily bend or warp the slides and make them difficult for us to get a good scan. You might want to put the slides in a tightly wrapped envelope rather than use rubber bands. If you do use rubber bands, use a heavy piece of cardboard on both sides of your stack so that the bands do not damage the slides.
Correct Stacking Orientation
Arrange your slides so that:
- If you put them into a viewer, the side toward you faces DOWN in the stack
- The slides with the company logo should face UP
- The first slide in the stack should be the TOP slide
- The second slide down should be #2, and so on
Example: Properly Stacked Slides (Logo Side Up)
This is how your stack should look from the top—logo side facing up, ready to be numbered.
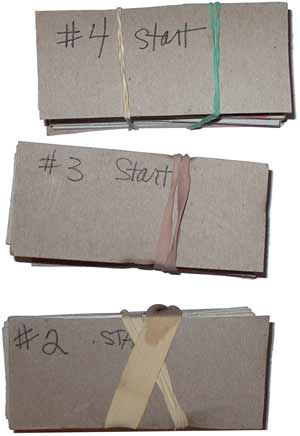
Step 4: Number Your Slides
It is IMPORTANT that you number your slides. This ensures they're scanned in the correct order and returned to you properly organized.
How to Number Correctly
- Number on the LOGO side of your slide (this is the side that needs to be UP in the stack)
- The top slide in the stack = #1
- Second slide = #2, and so on
- Use a permanent marker or pen
- Write clearly so we can read the numbers
Don't overthink this. Just give us what we need. We will make sure it turns out correctly when we're done.
Example: Numbered Slides (Logo Side with Numbers)
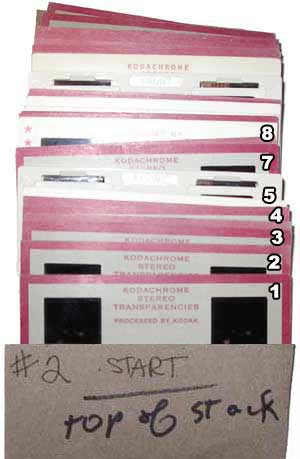
Number clearly on the logo side. Slide #1 is on top, #2 is second, and so on.
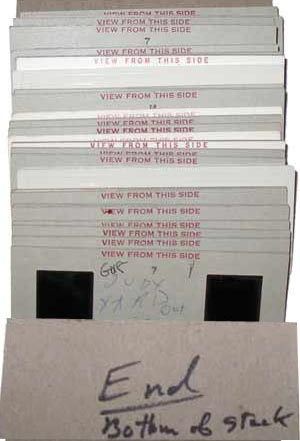
View from Bottom of Stack
The slides below show the stack from the bottom. This is what the BACK side of your slides should look like when properly stacked.
Additional Important Notes
Don't Cut Your 3D Stereo Slides
Do not cut your 3D stereo slides. You won't save any money and it will just make it harder for us to scan them.
We Scan One Side Only
Please NOTE: We are sorry but we will NOT scan both sides of the slide. This is not in our workflow and we cannot change our workflow. Please don't ask. The answer is no. Sorry.
Quick Prep Checklist
- ✓ Clean each slide with a very soft cloth
- ✓ Check for damage (see repair page if needed)
- ✓ Use Post-Its to mark the side you DON'T want scanned
- ✓ Stack slides with logo side UP
- ✓ Number slides on logo side (#1 on top)
- ✓ DON'T use tight rubber bands
- ✓ DON'T cut slides
- ✓ DON'T ask us to scan both sides
Ready to Get Your 3D Stereo Slides Scanned?
Once you've prepared your slides following these instructions, you're ready to send them in for scanning!
Questions About Preparation?
If you have any questions about preparing your 3D stereo slides, please contact us. We're happy to help ensure your slides are prepared correctly for the best possible scanning results.