
 Home
Home Order Forms
Preparing Your Slides for Scanning
To get the best results and the right viewing orientation, please follow these steps before sending your slides. This page explains how to identify fronts vs. backs, why landscape rotation matters and what happens if you skip it, how to stack efficiently, what storage formats we cannot accept, and how to package your slides for safe shipping. Taking 20 minutes to prep your slides correctly saves time, reduces cost, and ensures your scans come back in the right order.
Why Preparation Matters
We have kept 35mm slide pricing low for over 20 years, but that pricing depends on being able to process slides efficiently. When slides arrive correctly oriented with fronts facing up and all slides rotated to landscape, we can scan your entire collection without stopping to fix orientation errors.
When slides arrive with mixed orientations or in storage containers we cannot use, we either charge a correction fee or contact you before starting. A few minutes of prep prevents both.
The other reason prep matters is scan quality. A slide fed the wrong way produces a mirrored or upside-down image. A portrait slide not rotated to landscape gets its top and bottom cropped. These cannot be fixed in Photoshop — they require re-scanning.
Fronts vs. Backs — Identifying the Screen Side
- Front: Usually the colorful side with a manufacturer logo (Kodachrome, Ektachrome, Fuji) or the words “This Side Toward Screen.”
- Back: Typically plain cardboard with only a date, number, or processing code stamped on it.
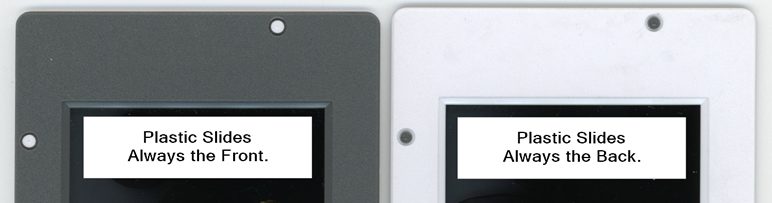
- Plastic mounts: Often have a solid gray or black front face and white back. Many have “This Side Toward Screen” embossed on the front, visible when tilted at an angle to the light.
These slides below are all Fronts. They should face up in your stacks.

These are Backs of cardboard mounts—plain, often with dates or numbers.

Plastic holders often say “This Side Towards Screen” on the front.

Some plastic slides have a solid color (gray/black) on the front and white on the back.
Stacking Basics
Fronts face up. The top slide in each stack scans first; the bottom scans last. This determines the order your digital files are numbered, so if sequence matters — a wedding, a trip in chronological order — make sure your stack runs in the order you want.
Keep stacks larger rather than smaller. A single stack of 100 slides takes far less handling time than ten stacks of 10. Large stacks cost nothing extra and speed up your order.
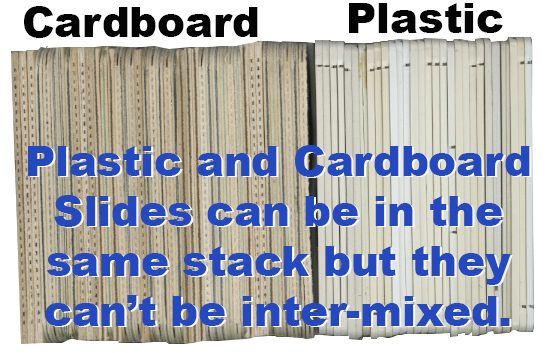
- Cardboard and plastic slide mounts can go in the same stack. No need to separate by mount type.
- If one chapter requires multiple stacks, label them 1a, 1b, 1c so we know they scan in sequence.
- If exact order within a stack matters, number the fronts with pencil. Never write on the backs — ink can offset onto the image surface of the slide beneath.
- Keep stacks to 50 slides or fewer. Larger stacks are hard to handle without dropping.

Rotate Every Slide to Landscape Position
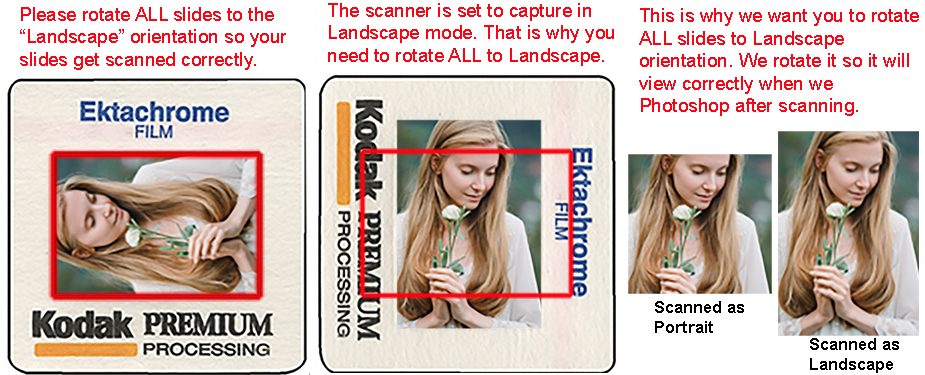
This is the step most people skip, and it is the one that causes the most problems. Every slide in your stack must be physically rotated to landscape position before scanning, regardless of whether the original photo was taken in portrait or landscape orientation.
Here is why: our scanners have a fixed landscape-oriented scanning area. The sensor reads across the wider dimension of the slide. If a portrait-oriented slide is placed in the scanner without rotating it, the scanning area captures only the center of the image — cropping off the top and bottom. For a portrait photo of a person, this typically means losing their head and feet.
The solution is simple: physically rotate every portrait slide 90 degrees so its longer dimension runs horizontally, matching the landscape orientation of the scanning area. We then rotate the digital image back to the correct portrait orientation in Photoshop before delivering your files. The result looks exactly right — but it only works if you rotate the physical slide first.
A common mistake: people sort portrait slides upright in a stack and landscape slides flat, thinking this helps. It does not. Every single slide — portrait and landscape alike — needs to have its rectangular film area pointing in the same direction throughout your stacks.
Packaging Tips — How to Ship Slides Safely
Standard 35mm slides are 2″×2″ and ship well in any box that holds them snugly without excessive movement. The most common packaging options are:
Original slide boxes (the small cardboard boxes from the photo lab) work perfectly if they are in good condition. Stack multiple boxes in a larger shipping box with bubble wrap between them.
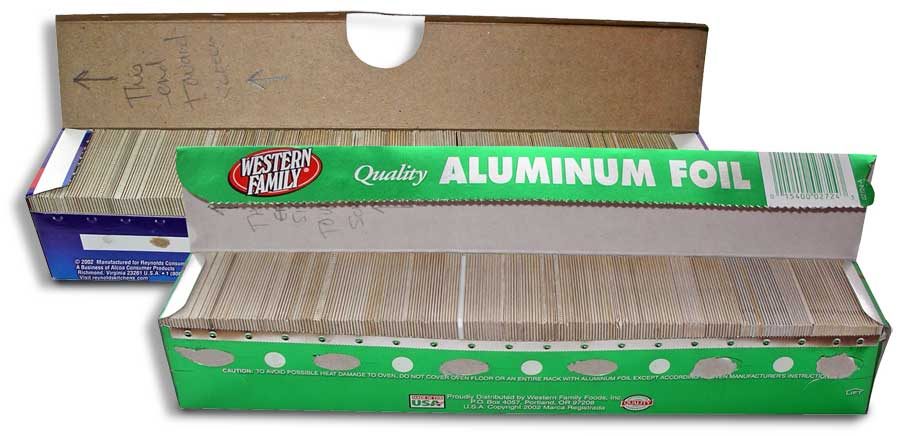
Rubber-banded stacks in a rigid box — wrap each rubber-banded stack in a sheet of paper or bubble wrap to prevent scratching, then pack the stacks snugly in a rigid cardboard box. Do not use an envelope — slides can bend.
Divider cards between groups — if you have multiple chapters or events, place an index card between each group with the group name or number written on it. This makes it immediately clear where one group ends and the next begins without any risk of mixing.
Use 2″×2″ boxes that fit slides without excessive play. Mark the box or include a note indicating where to start scanning if a specific starting point matters. Ship in a sturdy outer box — never in a padded envelope, which provides no protection against bending.
Storage We Can’t Accept
We are a scanning service, not an organizing service. These storage formats cannot be fed through our equipment without preparation — please remove slides from them before shipping:
- GAF or Sawyer 100-slide carousels — remove slides and send as rubber-banded stacks. Kodak 80-slide and 140-slide Carousel trays are fine to send as-is. Sawyer carousels also tend to permanently bend slides from years of upright storage — see our warped slides page for details.
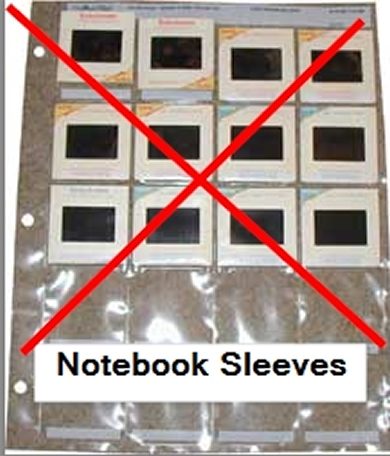
- Notebook sleeve pages — clear plastic pocket pages for three-ring binders. Remove slides and stack before sending.
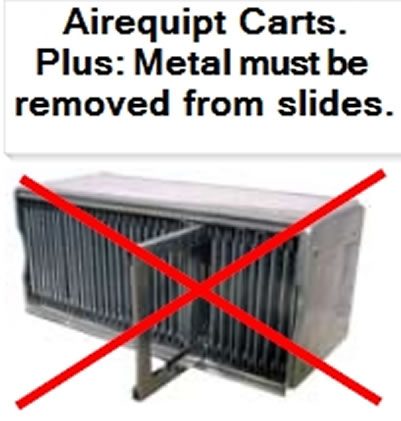
- Airequipt cartridges — semicircular plastic cartridges for Airequipt projectors. Remove metal retaining clips and extract slides before sending.
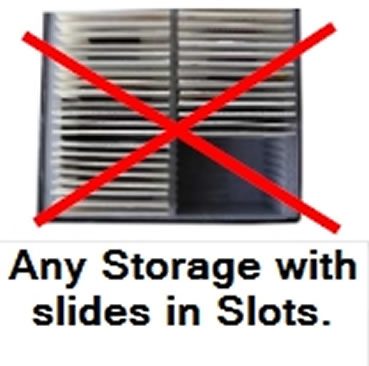
- Individual slotted storage boxes — boxes where each slide sits in its own slot. Remove slides and combine into stacks.

Pre-Shipping Checklist
Before sealing your box, run through these:
- ✓ All fronts face up in every stack
- ✓ Every slide rotated to landscape position
- ✓ Stacks are as large as practical (50 or fewer per stack)
- ✓ Multiple stacks for one chapter labeled 1a, 1b, 1c
- ✓ Fronts numbered in pencil if exact order within a stack matters
- ✓ Slides removed from Sawyer/GAF carousels, notebook sleeves, and Airequipt cartridges
- ✓ Packed in a rigid box with bubble wrap — not an envelope
- ✓ Order form printed and included in the box