
 Home
Home Order Forms
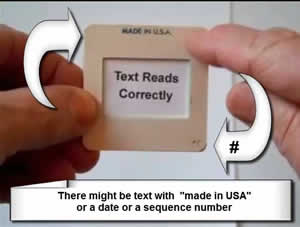
Determine Front and Back Of Slides
Don't Overthink This—We'll Make It Simple
We know identifying slide fronts and backs can be confusing. We've been helping customers navigate this since 2002, and we've refined our explanation to make it as clear as possible. Here's what matters:
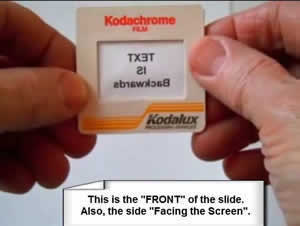
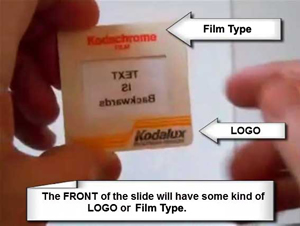
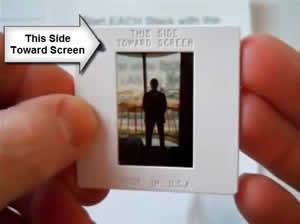
The golden rule: The side with the LOGO (Kodak, Fuji, etc.) is the FRONT of the slide. This is also the side that faces the screen during projection.
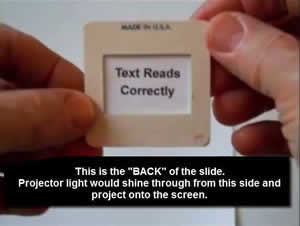
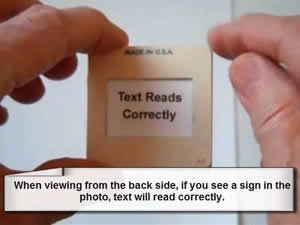
Don't worry about text appearing backwards when you hold slides up to light. We'll ensure your final scans display correctly on your TV, computer, or prints. We just need everyone using the same standard for preparation.
Visual Guide: Front vs. Back
The Reflection Test (When Logos Aren't Clear)
Note: This reflection method works for most slides, though some can be tricky. When in doubt, go with "logo side = front."
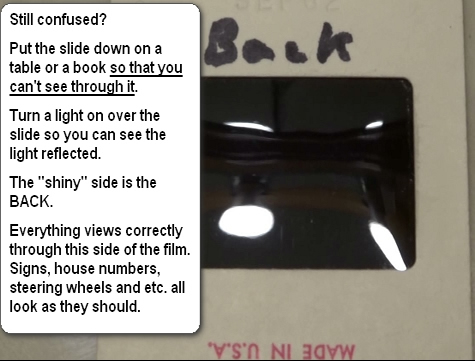
Still confused? Place the slide on a table or book so you can't see through it. Turn on a light above it. Look at the reflection: sharp reflection = BACK. Dull or blurry reflection = FRONT (emulsion side).
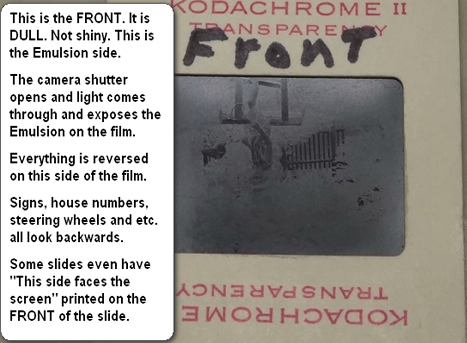
The FRONT (emulsion side) is where the camera shutter opened and light exposed the image onto the film. Everything appears reversed on this side—signs and numbers read backwards. Some slides even have "This side faces the Screen" printed on the front/emulsion side.
Why This Matters
Consistent orientation ensures efficient scanning and prevents mix-ups. Many people naturally organize slides the opposite way we need them, which causes delays. By following this simple standard (logo side = front), we can process your slides quickly and correctly.
Remember: Don't stress about backwards text when checking slides. We handle all the digital rotation after scanning. Just give us the slides with logos facing the way we've described, and we'll take care of everything else.